Root Android Gingerbread 2.3.3-2.3.6.
Complete step by step Video tutorial in English
You can Root your Samsung Galaxy Ace GT-S5830, GT-S5830C, GT-S5830D, GT-S5830i, GT-S5830M, GT-S5830v (Android Gingerbread 2.3.3-2.3.6) over Internet or Wi-Fi
1) Download the file and save it to your phone's SD card.
All files are hosted on XDA forum! Select the right link for your phone model:
S5830 ONLY! → root_S5830.zip
S5830i ONLY! → update.zip (xda forum)
S5830i/D/v → Universal_GB_ROOT_v9.zip (xda forum)
S5830C/i/M → ROOT-S5830C-i-M.zip (xda forum)
2) Switch off your phone and reboot into recovery mode (power home button or power volume up home buttons)
3) Select "Update from sdcard" and apply the downloaded file
3) Reboot in normal mode and your should have root access to your Android phone.
Why to root your Android device?
The greatest advantage that rooting provides is the ability to install powerful applications that require more-than-usual privileges to your device. Ability To Flash Custom ROMs. To Unlock your phone from your carrier and use it freely in any network. And many more.
Disclaimer: I will not be held responsible if you mess up your phone by following my instructions. Rooting might be dangerous for your phone and might void your phone's warranty. Ensure you understand all risks you take before continue.
How to Root Samsung Galaxy Ace GT-S5830/i/C/D/M/v
Get Your SIM Network Lock Control Key for FREE using Play Store Apps.
Video tutorial in English.
You can unlock your Samsung Galaxy Ace GT-S5830 from any network (3 Three, O2, Orange, Vodafoon, T-Mobile, Virgin, Tesco, AT&T and others) by following this steps:- Check if your phone is locked to a network
To check that your phone is locked to a network insert other network SIM card and you will get a prompt to "Enter Network Lock Control Key"
Or in dial mode enter *#7465625# and see if "Network Lock" is "ON" - Your Phone has to be Rooted
See how to Root your Samsung Galaxy Ace - Go to Play Store and install "Busybox" and "Galaxy Ace Unlock" apps
- In Busybox app run "Smart Install"
- Get Network Lock Control Key
Run "Galaxy Ace Unlock" app
Click "Unlock" and get a list of Unlock codes.
Then switch off your phone. - Unlock your phone
Insert a SIM card from another network carrier and turn on your phone
Enter a number from your list in the prompt "Enter Network Lock Control Key"
Click "Unlock"...
And you should get a message "Network unlock successful"
Your phone now is Unlocked to any network!
How to Unlock Samsung Galaxy Ace GT-S5830
And get warranty back
If you have rooted Samsung Galaxy Ace GT5830 you can unroot it to restore/recover/return your warranty by following this simple steps:I wouldn't recommend to unroot custom ROMs, do it on stock firmware only!
1) Delete all root dependant applications
2) Download this file to your SD card.
Select the right link for your phone model:
S5830 → unroot_s5830.zip
S5830i → unroot.zip
S5830C/i/M → UNROOT-S5830C-i-M.zip (xda forum)
S5830i/D → Universal_GB_UNROOT.zip (xda forum)
3) In recovery mode select "apply update from sdcard" and apply the file.
And you should get a message "Install from sdcard complete".
Select "reboot system now".
4) Your phone should be unrooted now and you can delete all
root dependent applications if you haven't done it yet.
How to UnRoot Samsung Galaxy Ace GT-S5830
Let’s have a look at the method to take Long Scrolling Screenshot on any Android with the help of two cool Android apps that will let you take such screenshots with great ease. So have a look at the complete guide below.
LongShot is a third-party app that could be found in the Google Play store. The app is specially made for the only purpose to capture the long form screenshots. The process is simple, just open the app and then select Capture option. Start up with your pointing screen and move it slowly as the app stitches the quickly taken screenshots. The output will be a long form screenshot!
Step 1. First of all, download and install LongShot on your Android device from the Google Play Store.
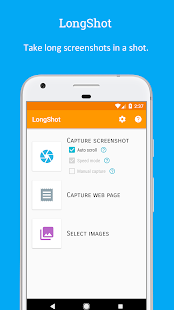
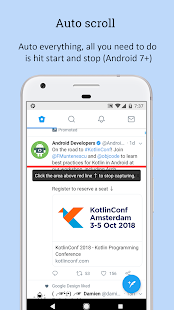
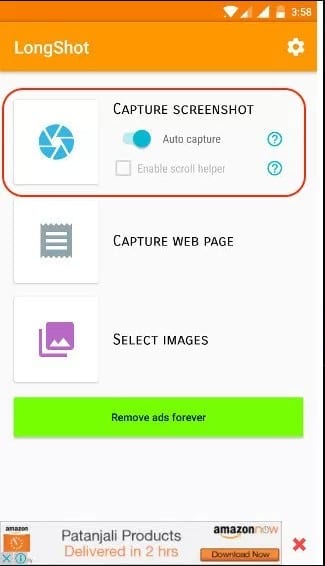
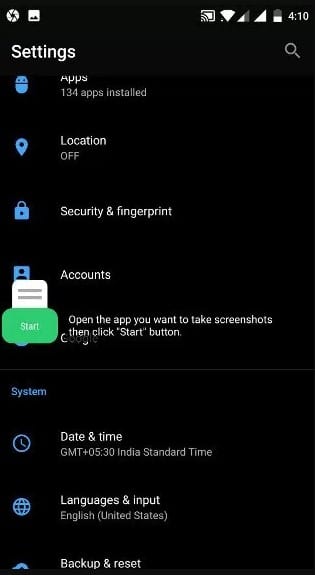
Step 2. Now open the app and grant all the permissions. Now you will see the main page of the app where you need to enable the option ‘Auto capture’
Step 3. Now you will see a Start button on your home screen. Now you need to browse to the page where you want to take the screenshot and then tap on the start button.
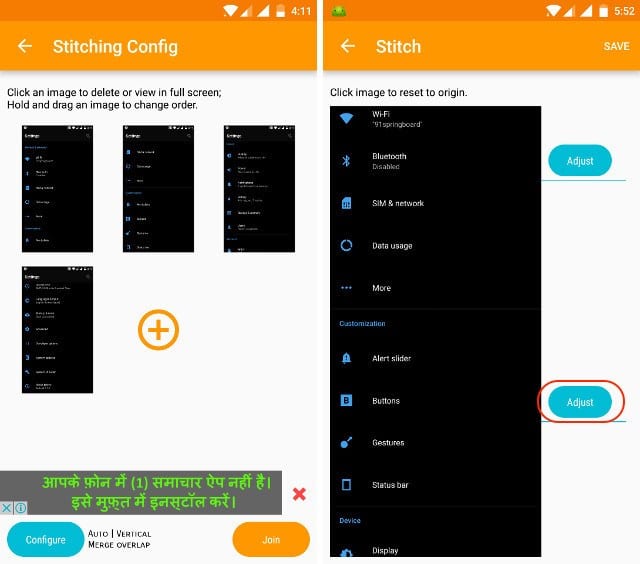
Step 4. After tapping on the Start, you need to scroll the page slowly to the point you want to take a screenshot. Once done, tap on the ‘Done’ button.
Also Read : How To Get a Recycle Bin on your Android mobile
Step 5. Now the app will show you the individual screenshots. Just tap on the Join button and the app will combine the screenshots for you.
So, this is how you can use LongShot on your Android smartphone to take long scrolling screenshots.
Download LongShot for long screenshot App
How to Take Long Scrolling Screenshot on Any Android
If we talk about an Android operating system, the reason people choose Android over other mobile OS is that this platform has different kind of features for every particular purpose. We have managed to collect some of the useful codes for Android users which will help those who’re worried about being tracked.
Most of the malware is targeted to an Android operating system because Android is now powering a majority of smartphones. Safety should always be our top priority in these cases. Here we are going to mention few short codes that will help you find the settings of your phones and to find out either your messages and information are being tracked.
We have managed to collect some of the useful codes for Android users which will help those who’re worried about being tracked.
Code 1: *#21#
This code will let you find out whether your messages, calls, and other data are being diverted. You can find details about call forwarding. You can even find out where your data, voice, fax, SMS, sync, async, Packet access, and pad access call forwarding enabled or disabled.Code 2: *#62#
If your friend tells you, that your number is saying no-service or no-answer, then you need to dial this code on your smartphone to find out where your calls, messages, and data are being redirected. There are possibilities that your calls are being redirected to one of your cell phone operator’s numbers.Code 3: ##002#
This is a universal code to deactivate all call forwarding. This will immediately switch off all the redirections from your phone. If you feel that your call is being redirected, then you can dial this code to stop the redirecting. It will be a good idea to use this code before you have to use roaming so that the money won’t be taken from your account.Code 4: *#06#
This code is used to find the International Mobile Equipment Identifier (IMEI). This code will be very useful to find the IMEI number of your smartphone. You can note down your IMEI number in a safe place. With the help of IMEI number, you can find your phone if someone steals it.Code 5: *#*#4636#*#* or *#*#197328640#*#*
This special code allows anyone to track your location and also determine whether someone is following you.Type in the following code in dial pad and then select the section called UMTS Cell Environment, then choose UMTS RR info. Now note down all the numbers under the Cell ID.
Now move to the main menu and then click on MM info tab > Serving PLMN. Now note down the numbers under Local area code (LAC).
After noting down these two numbers open the website opencelid and select the fourth tab to the left. From there you can determine the location on the map of the basic station that your phone is connected to.
Also Read : How Safe is it to Use Finger Recognition with Your Bank App?
How To Protect Yourself From Spies
Above, we have listed a few codes which would help you to figure out whether you are being tracked or not. However, these codes can’t keep the hacker or spies away from you. So, you should take some appropriate steps to protect your computer against criminals and spies.
#1 Using an encrypted message is the best option to keep your phone away from spies. You can use secure messaging apps like Wickr, Telegram, Chare or Signal which encrypts all your messages.
#2 Don’t ever enable the option ‘Unknown Sources’ on your Android smartphone. The feature is been there for a reason and it provides good security to your Android. If you still choose to enable the option, make sure to disable it after using.
#3 Don’t do banking transaction from your Android smartphone. There are banking apps available in the Play Store, but they are not always the best choice. If possible, don’t store important credentials on your Android smartphone.
#4 There are lots of apps available on the web which claims to find out who’s tracking you. Those apps are often a scam and it just traps users. You should always rely upon your cell phone operator to offer you tracking services. Websites or apps that claim to find out the location of other people are almost certainly acting with criminal intent.
So, these are the 5 codes which will help you to find out more about the settings of your phone and to find out whether your messages are protected or not. Hope you like the article, share it with your friends too!
How To Find Out Who’s Tracking You Through Your Android
We all know very well that extensions give browsers additional capabilities that do not exist natively. They are small additional tools that simply help users. However, now according to the latest reports, recently, a well-known extension caught stealing users’ data secretly and sending it to another firm for its own profit.

Extensions give browsers additional capabilities that do not exist natively. They are small additional tools that simply help users.
However, they are not always controlled by browser stores, hence, there may be problems. This is what is happening now in Chrome and Firefox, with a much-needed extension, Stylish.
This extension exists for both Mozilla Firefox and Google Chrome browsers and allows users to customize the pages they visit, giving them a unique image by changing the many elements of these pages.
These features made this extension an option for many users, who seek to personalize their navigation, giving a new image to the sites they visit.
Since changing hands last year, Stylish has undergone some changes, which have gone unnoticed by all users. An analysis now found that Stylish is sending browsing data to its parent house, the SimilarWeb, and that allows users to identify unequivocally.

The security researcher who discovered this behavior detailed this situation and reported that too much data is being sent anonymously as expected.
Also Read: 4 Best Third-Party YouTube Apps for Android You Should Try
The bigger problem is that this information also follows a unique identifier of each user, which allows tracing the data collected for each of the users, something that violates their privacy.
SimilarWeb has expressed in its policy the collection of data but refers that it does so anonymously, something that does not actually happen, as it has now been proven.
Both the Chrome and Firefox versions have been removed from their stores, but it is now necessary for users to remove Stylish from their browsers, or they will continue to send data to SimilarWeb.
Immediately Remove This Extension From Your Browser
Now you can Troubleshoot Your iPhone’s Wifi Hotspot using the different ways that will help you to work it correctly as lots of time you must be facing this problem. So have a look at complete guide discussed below to proceed.

Below we had discussed some ways that you can use to make your iPhone’s hotspot work correctly.
Also Read: How to Shoot Background Blur On Single Camera
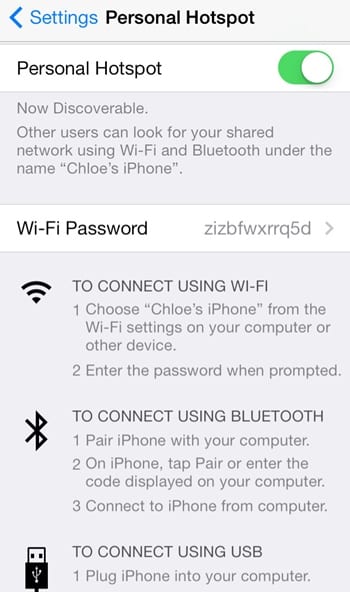
#1 The very first thing that you could do is to turn the hotspot off and switch it on again. Basically, this restarting of the hotspot removes any of the issues for most of the times. You connect to the selected network again and nothing would block it from working. While if the issue is persistent then you would have to prefer the other options that are stated below.
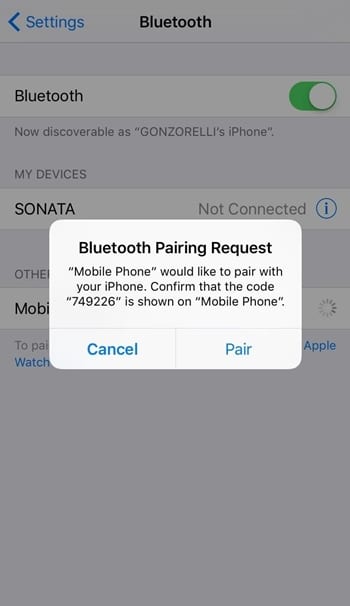
#2 Try to make the connection through the Bluetooth Tethering rather than Wifi Hotspot as the network would not be suitably connected to it. The USB connection is considered as the best option for making the network connection among the two devices so we would prefer if you could go for this particular option. As USB requires the devices to be connected to the cable so there would be the least distance availability between the two connecting devices.
#3 Reboot Your devices once and turn on the Hotspot or any other way of transferring the internet and you should see that the issues would be all gone. Lastly, this is the only working method that could help you and if it is not working for you then possibly there is an issue with your devices that require the complete checkup. For that go to the repair person and he would only be able to solve it out.
As you have got that the method is really easy to be applied so it could be easier for any beginner to grasp the benefits out of this method and hence complete the related tasks. We hope that you would like this article and the whole information provided here in this article, if it is so then please do like up this article. Also, share this article with as many people as you could so that the others would also gain the knowledge about the information insisted here.
How to Troubleshoot Your iPhone’s Wifi Hotspot
Best WordPress hosting services 2020 in the table below. Logo Plan Price/ month Features Support View Full Review Basic $2.95/mo. 1...